How do I set up the WiFi for my SWARM?
The SWARM requires an internet connection, via 3G / 4G / LTE, WiFi or PoE, because the SWARM sends the measurement data automatically to the Omnidots servers and thus to the Honeycomb web platform. In this FAQ item you can read how to set up the WiFi for the SWARM.
Why 3G / 4G / LTE, WiFi or PoE?
The SWARM automatically communicates to the Omnidots servers via 3G / 4G / LTE. Thanks to the 3G / 4G / LTE modem in your SWARM, you do not have to configure anything; the measurement data will automatically end up in Honeycomb.
Sometimes there may not be access to 4G / 3G or LTE connection, for example if you want to monitor vibrations in a remote area without any coverage. You can then easily use WiFi to connect your SWARM to the internet. Is there also no access to WiFi on site? Then use the Omnidots PoE Adapter to provide your SWARM with wired internet (ethernet) and power in one go.
Setup your SWARM WiFi
To set up the WiFi you can use your own device, such as your smartphone, laptop or tablet. You can only set up WiFi if you are physically nearby the SWARM. This must be done at the place where you are going to install your SWARM, because you must be near your SWARM and within range of the desired WiFi network on the construction site to be able to set up WiFi connection for your SWARM.
Step 1: Login to Honeycomb and create a new measuring point
- Go to Honeycomb on your own device.
- Log in with your username and password. If you don't have an account yet, you can sign up to create an Omnidots Honeycomb account.
- Click on 'Measuring point' in the menu at the top of the page and then on 'Create measuring point'.
- Follow the steps on the screen. If you need help with this, please see the following FAQ: 'How do I create a measuring point in my Honeycomb account?.
- After saving, click on 'Measuring point' and then on 'Overview'.
-
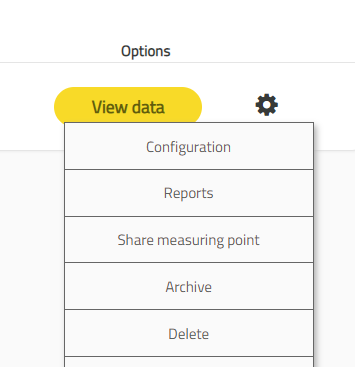
The overview shows the measuring point. Click on the gear on the right side and then on 'Configuration':

SWARM configuration
-
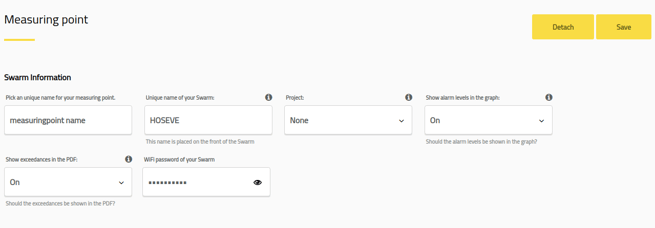
This will take you to the settings page of your SWARM. Here you can view the WiFi password of your SWARM:

SWARM WiFi setup
- Click on the eye icon to see your SWARM WiFi password.
Step 2: Make a WiFi connection between your device and the SWARM
- Place your SWARM on a stable surface and connect the SWARM to mains power. The AC adapter and cable are included with your SWARM. If you do not have a socket nearby, you can connect the SWARM to a SWARM Battery. Once the SWARM is connected, leave it on the stable surface.
- The SWARM will start up. This takes about 1 to 2 minutes.
- Once the SWARM has started up, the LED lights up in a breathable pattern green / black (then the SWARM has picked up a 4G connection) or yellow / black (then there is no 4G connection).
- Now that the SWARM has started, it is important that you immediately set up the WiFi. This must be done within 5 minutes after starting the SWARM. Did you not start within 5 minutes? No problem, restart the SWARM by removing it from the power supply and then reconnecting it back to the power supply. You now have five minutes again to set up the WiFi.
- Search for available WiFi networks on your own device.
- You will see a network name that matches the name of your SWARM. The name of your SWARM can be found on the front of the SWARM. This is always a combination of 6 random letters.
- Click on the WiFi network and connect. You will be asked for the password. Enter the password you found under step 1.
Step 3: Set up the WiFi for your SWARM
-
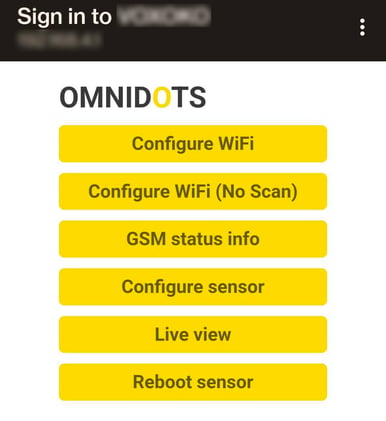
As soon as the WiFi connection has been established, you will automatically see the following menu on your device:

Annotation
- Click on 'Configure sensor'.
-
Then you will see a yellow menu again. Now click on 'UseWiFi'.

UseWiFi
-
You will then see an entry field. There you enter the number 1, just like in the picture below. Then click on 'save'.

Change UseWiFi
-
You will see the following and click on 'back'.

Saved
-
Then you will see the following menu, in which you click 'back' again:

Back
-
You are now back in the main menu and you will see the following. Click on 'Configure WiFi'.

Back to main menu
-
Select the desired and available WiFi network, or enter the name of a hidden WiFi network in SSID. Enter the password of the selected network. Then click 'save' to save the WiFi settings. Below is an example:

WiFi examples
-
Now unplug it, wait until the SWARM is doing nothing, then plug it in. Confirm if the SWARM LED is breathing green/purple light, if so the SWARM now has WiFi connection.
As soon as your SWARM is successfully connected to the selected WiFi network, the WiFi network of the SWARM itself will no longer be available nor visible on your device after a few minutes.